 July 2, 2019
Your asphalt paving in Central Illinois requires a little TLC from time to time to ensure that it remains stable and durable. For example, you need to add a sealcoat every few years to increase your pavement’s strength.
How do you know when it’s time for a sealcoat? Typically, you’ll need one every 2-3 years or so. Any sooner and you will add too much, and any later and the sealcoat will wear off too fast. Understanding every step of this process – including preparation, weather, and application – can ensure things go smoothly for you.
Proper Preparation
When you’re attempting to sealcoat your asphalt paving, you need to perform a reasonably extensive evaluation and preparation process to ensure that everything goes smoothly. These steps help to ensure that your asphalt is as strong as possible and that it won’t suffer from any problems during the sealcoating process. Just a few steps in this process include how you should:
Check the Surface
Repair Imperfections – If your asphalt has a variety of imperfections, such as potholes, oil stains, cracks, or any other kind of damage, you need to get them repaired before you get a sealcoat. The surface of the asphalt must be as stable as possible, and imperfections may cause the sealcoat to set improperly and may trigger problems with your pavement in general.
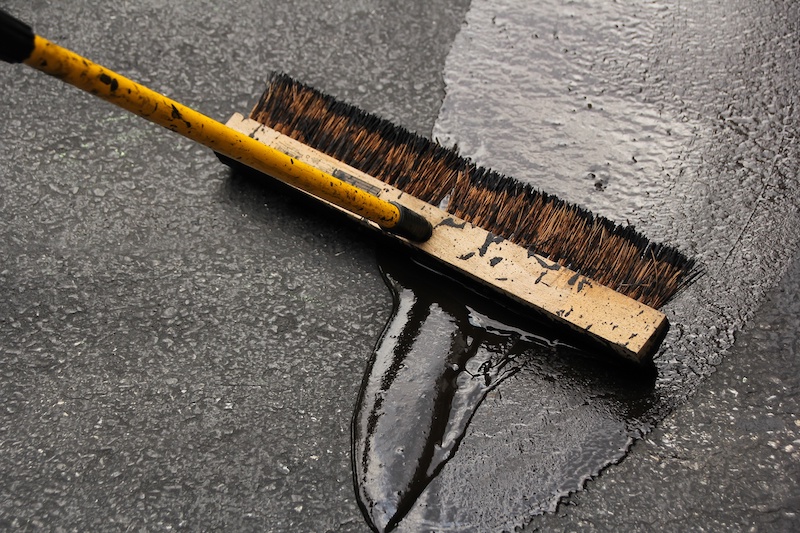
Clean the Pavement – After you’ve repaired your pavement with patches or new asphalt installation, you need to use brooms, brushes, or other types of washers to clean the surface. Doing so will remove dirt, mold, bacteria, and stains that could cause problems with your sealcoat. A power washer is a good choice because it will break apart deep stains and move water more efficiently.
These simple steps vary little when you install a sealcoat on your asphalt. The only changes would occur depending on the weather and temperature of the day on which you install the pavement. This factor is critical because improper weather conditions could cause your sealcoat to set incorrectly and may trigger other issues with your pavement that wouldn’t otherwise occur.
Check the Weather Conditions
The weather on your application day is surprisingly crucial to the quality of your sealcoating. If you don’t take the time to wait for the right day, you could do your sealcoating a grave disservice. That’s because a sealcoat is very sensitive to temperature, wind, and precipitation. Fully understanding these issues can make preparation easier by getting you to choose the best possible time for sealcoat application.
For example, a sealcoat applied when the temperature is below 50 degrees will set more slowly and may not set correctly in some areas of the asphalt paving. As a result, water, bacteria, and mold may more easily invade your asphalt and make their way down through the surface. And once the sealcoat does set after this invasion, you may trap these items under the surface and make escape more robust for them to handle.
Just as importantly, you need to make sure that you apply sealcoat on a dry and sunny day when the sun is high and the wind is low. Low wind conditions help to make the application process easier by avoiding blown or running sealant. The sun itself helps to improve the speed of the setting and ensures that the pavement is warm enough. Unfortunately, rain and other types of precipitation will cause setting issues that may complicate your asphalt paving sealcoating process.
Once you’ve adequately prepared your asphalt slab and the weather conditions are right, you can start to apply your sealcoat. This process is typically not that complex for most people to do if they have any experience with staining in the past. However, there are many mistakes that an amateur could make that would ruin the efficiency of this process, which is one reason why so many people choose professionals.
Applying the Sealcoat
Once your asphalt paving is prepared and ready for the sealcoating process, you can apply this liquid across the surface of your asphalt. As mentioned before, you’re going to need to perform this action at least every 2-3 years, but if this is your driveway’s first sealcoat, you need to add two coats to the surface. This process helps the sealant to penetrate the surface of the asphalt more efficiently and creates a stronger coating that will last for years against various types of weathering problems.
You can apply this sealant in a variety of different ways. Some people may want to apply it by hand using large rollers and brushes. This step is a good idea if you have some cracks and other areas that you weren’t able to repair and you want to make sure that they get the most sealant. However, this method can take more time and will also be harder on your body. You’ll need to work from front to back and left to right to ensure that you get the best results, which can be hard over an application period.
Thankfully, you can also apply your sealant using a power sprayer, which is the easiest way to sealcoat your pavement. Attach the sprayer to the appropriate barrel of sealcoat and turn it on to spread your sealant correctly. Try to move slowly even with this sprayer, though, to ensure that as much surface of your pavement gets covered as possible. And avoid, whenever possible, backtracking and covering up areas that you’ve already treated with sealcoat.
Find Professional Help
While sealcoating isn’t an overly challenging activity, mistakes can cause many issues. For example, you may miss applying the sealcoat into small cracks and make them more prone to damage. Even worse, you could add excessive sealcoat in one area and leave others relatively unprotected, which could produce some unattractive looks and styles.
So if you need to sealcoat your asphalt paving in Central Illinois, don’t hesitate to reach out to us today to learn more. Our professionals can assess the state of your sealcoating, let you know if you need a new application, and walk you through the whole process. With our help, you can ensure that your asphalt driveway is strong and stable for years to come.